Drywall Cracks & Structural Masonry Plugs
Gypsum board behaves elastically under thermal movement but shatters catastrophically when subjected to shear strain. Explore the engineering behind compound curing, structural anchors, and crack remediation.
Anatomy of Partition Failures
A standard drywall installation comprises a 12.5mm gypsum core enveloped between multi-ply cellulose facing sheets. Gypsum has high compressive strength but near-zero tensile strength. When an anchor pulls free from a hollow partition, it creates a cratered spall where the interior core has turned to chalk dust.
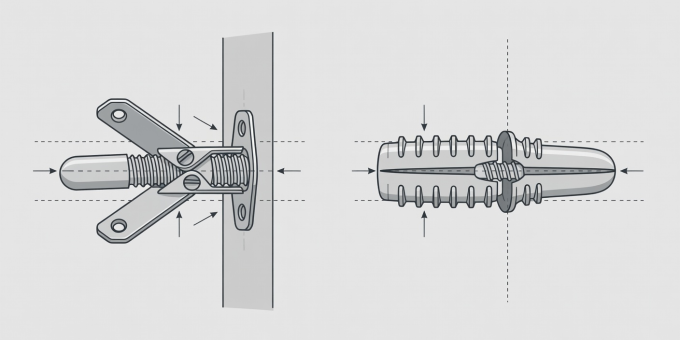
Selecting the incorrect fastener is the root cause of 95% of domestic wall damage. Review the load matrix below before mounting fixtures:
| Fastener Type | Substrate Suitability | Safe Working Shear Load | Mechanical Principle |
|---|---|---|---|
| Plastic Ribbed Plug | Solid Brick / Concrete only | 5 kg (Unsafe for drywall) | Radial outward compression inside rigid masonry bore. |
| Self-Drilling Zinc Anchor | Hollow 12.5mm Drywall | 15 kg static load | Coarse exterior auger threads bite into gypsum core. |
| Hollow Wall Metal Anchor (Molly) | Single or Double Drywall | 25 kg static load | Slotted metal legs collapse flat against cavity back. |
| Spring Toggle Bolt | Hollow Drywall & Lath | 40 kg static load | Dual steel wings span across 50mm of pristine rear paper. |
| Wood Stud Direct Lag Screw | C16/C24 Softwood Stud | 100+ kg structural load | Mechanical thread engagement into structural timber framing. |
Repairing Blown Wall Craters: The Hot Patch Technique
When an existing anchor tears a 50mm hole in a wall, simply smearing filler into the void fails because the filler has no rear backing to resist shrinkage or lateral impact. The “California Hot Patch” is the master conservator’s preferred technique:
-
Square the Damage
Using a utility knife with a fresh carbon steel blade, bevel-cut around the blown anchor hole to create a neat square aperture. Remove all loose paper frays and loose crumbly gypsum.
-
Fabricate the Framed Dutchman
Cut a scrap piece of drywall roughly 50mm wider on all four sides than the hole. On the reverse side, score the gypsum core to match the exact dimensions of the wall hole, then snap and peel the core away, leaving a 50mm border of intact front paper extending around the central gypsum plug.
-
Setting Compound Bedding
Apply chemically setting joint compound (such as 20-minute powder mud) around the rim of the wall cavity. Insert the drywall plug into the hole so the extended paper wings lay flat against the wall face. Smooth flat with a 6-inch steel taping knife, expressing excess mud from beneath the paper.
-
Feather and Seal
Once set, apply a wide feathered skim of ready-mixed lightweight topping compound extending 150mm beyond the patch edges. Lightly sand with 220-grit paper on a flat block and prime with PVA or shellac primer to seal porosity.
“Never paint directly over raw joint compound. Gypsum compound draws moisture from emulsions, causing localized flash dulling that exposes your patch from oblique lighting angles.”
— Workshop Finishes Protocol, Pickle Parade Popix